Having trouble with the Kelsey-Hayes ABS on your 2002 Workhorse P32 RV? Discover the best factory-level scan tools (like the GM Tech 2) to read DTCs, clear errors, and perform an automated ABS brake bleed.
If you own a classic 2002 Workhorse P32 series chassis RV, you know how reliably it handles the open road. However, when the Anti-Lock Braking System (ABS) light illuminates on your dashboard, diagnosing the issue can quickly become a headache.
Early Workhorse motorhome chassis utilize a specialized Kelsey-Hayes ABS module inherited from General Motors' medium-duty truck lines. Standard automotive code readers cannot communicate with this commercial-grade module. To read Diagnostic Trouble Codes (DTCs), clear system errors, and execute the crucial automated ABS brake bleeding process, you need a dealer-level diagnostic setup.
This comprehensive guide covers the exact scanner configurations required for the 2002 Workhorse P32 chassis and details how to navigate the complex ABS data layout.
The Best Scan Tools for Workhorse Kelsey-Hayes ABS Systems
To trigger bi-directional functions—such as cycling the internal isolation and dump valves during a brake flush—you need a diagnostic tool that mimics the original GM factory platform. Two highly effective options dominate the aftermarket today.
The absolute gold standard for early Workhorse chassis diagnostics is a
GM Tech 2 Scan Tool clone. Because original Vetronix units are rare and cost thousands of dollars, high-quality aftermarket clones are the go-to solution for RV owners.
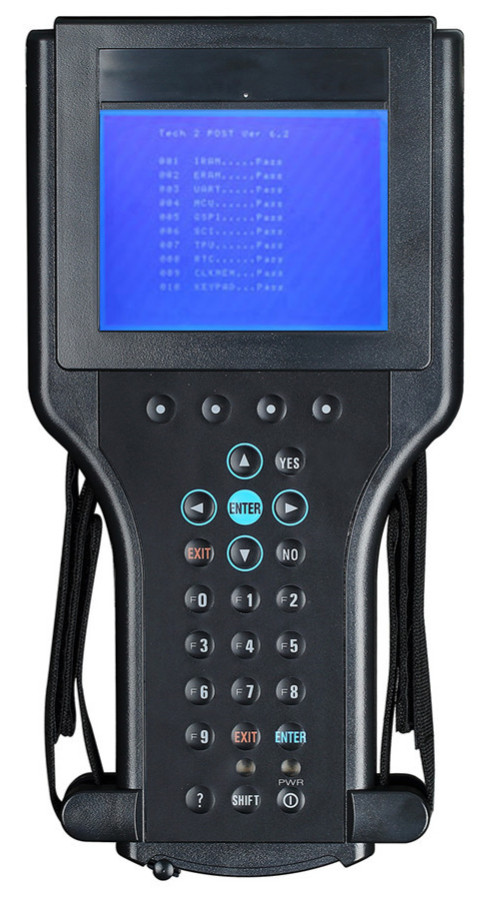
To ensure compatibility with your 2002 P32, your scanner kit must feature:
- The CANdi Module: The Controller Area Network diagnostic interface adapter. While your 2002 chassis relies on the older J1850 VPW protocol, keeping the CANdi module inline allows the scanner to properly step down and regulate data stream speeds without crashing the Kelsey-Hayes module.
- 32 MB PCMCIA Card: This is the brain of the scanner. You must ensure the card is pre-loaded with GM North American Software (Version 33.004). This specific software volume contains data architectures for GM Commercial and Medium Duty Truck platforms, which inherently includes the Workhorse Custom Chassis (WCC) database.
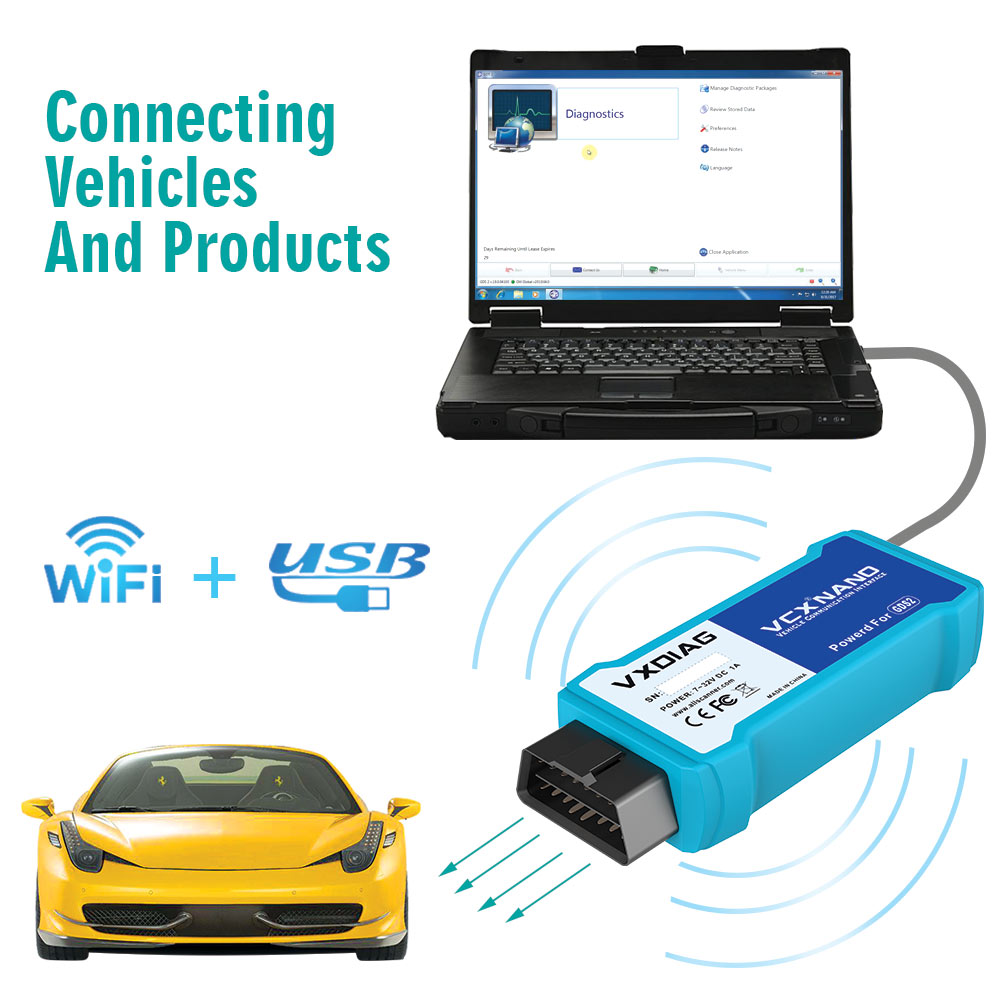
2. PC-Based Tech2Win (Software Emulation)
If you prefer to avoid bulky handheld hardware, a PC-based emulator is an excellent alternative. You can purchase a pass-through vehicle interface adapter, such as the
VXDIAG VCX Nano for GM, and connect it to a Windows laptop.
By running Tech2Win software, your laptop transforms into a virtual GM Tech 2 scanner. It offers identical bi-directional capabilities, allowing you to activate the ABS automated bleed sequences directly from your computer screen.

The Workhorse Diagnostic Port Trap: Where is the ABS Data Line?
Before plugging your scanner into the standard 16-pin OBD-II port under the dashboard, you must look out for a common factory quirk unique to early 2000s Workhorse chassis.
On many P32 assembly lines, the factory did not wire the ABS data communication line into the standard OBD-II diagnostic port.
If your scanner powers up but displays a "No Communication with Module" error, inspect the area under your steering column or near the engine firewall. Look for a round, heavy-duty 9-pin Deutsch connector. In many Workhorse configurations, the Kelsey-Hayes ABS module data stream is isolated entirely to this commercial port. To bypass this, you will need to acquire a 9-pin to 16-pin OBD adapter cable to link your Tech 2 scanner directly to the ABS network loop.
Step-by-Step: Accessing the ABS Automated Bleed Procedure
Once your scanner is connected and communicating with the coach, manually forcing trapped air bubbles out of the complex Kelsey-Hayes valve block requires an automated bleed. Use the following diagnostic pathway:
- Boot the Scanner: Turn on the ignition key (engine off, battery on) and power up the Tech 2 environment.
- Select Vehicle Profile: Choose Diagnostics → Select Year (2002) → Select Product Type (Commercial or Passenger Car/Light Duty Truck, depending on your specific software flash card layout).
- Identify the Brand: Navigate to Workhorse Custom Chassis. (Note: If "Workhorse" is missing from your software version, select G-Van or P-Chassis under the standard Chevrolet/GMC truck menus).
- Target the System: Select Chassis → Anti-Lock Brake System (ABS) → Special Functions.
- Execute: Select Automated Bleed / Functional Test.
From here, the scanner will prompt you to apply pressure to the brake pedal while it sequentially commands the ABS solenoids to cycle. This process forces old fluid and trapped air down to the bleeder screws on the brake calipers, restoring a firm, safe pedal feel.
Summary Checklist for Workhorse Owners
| Tool/Requirement |
Specification / Notes |
| Primary Scan Tool |
GM Tech 2 Clone or PC-based Tech2Win Emulator |
| Interface Module |
CANdi module included (or VXDIAG VCX Nano pass-through) |
| Software Card |
32 MB PCMCIA Card with GM North American v32.007+ |
| Menu Path |
Commercial → Workhorse → Chassis → ABS → Special Functions |
| Hidden Hazard |
Check for a separate 9-pin Deutsch connector under the dash |
By investing in a GM factory-style diagnostic system, you gain full autonomy over your 2002 Workhorse P32 chassis maintenance. You will no longer be forced to rely on specialized commercial truck shops just to clear a simple ABS sensor glitch or flush your brake lines.
To help diagnose any issues further, feel free to share the exact ABS trouble codes your scanner pulls or describe the brake pedal symptoms you are experiencing. I can provide the precise troubleshooting steps for that specific Kelsey-Hayes fault code!


